Creating a Dine-in Order
This is the thing you'll do most as a waiter or cashier: open a table, add the guests' orders, and send them to the kitchen.
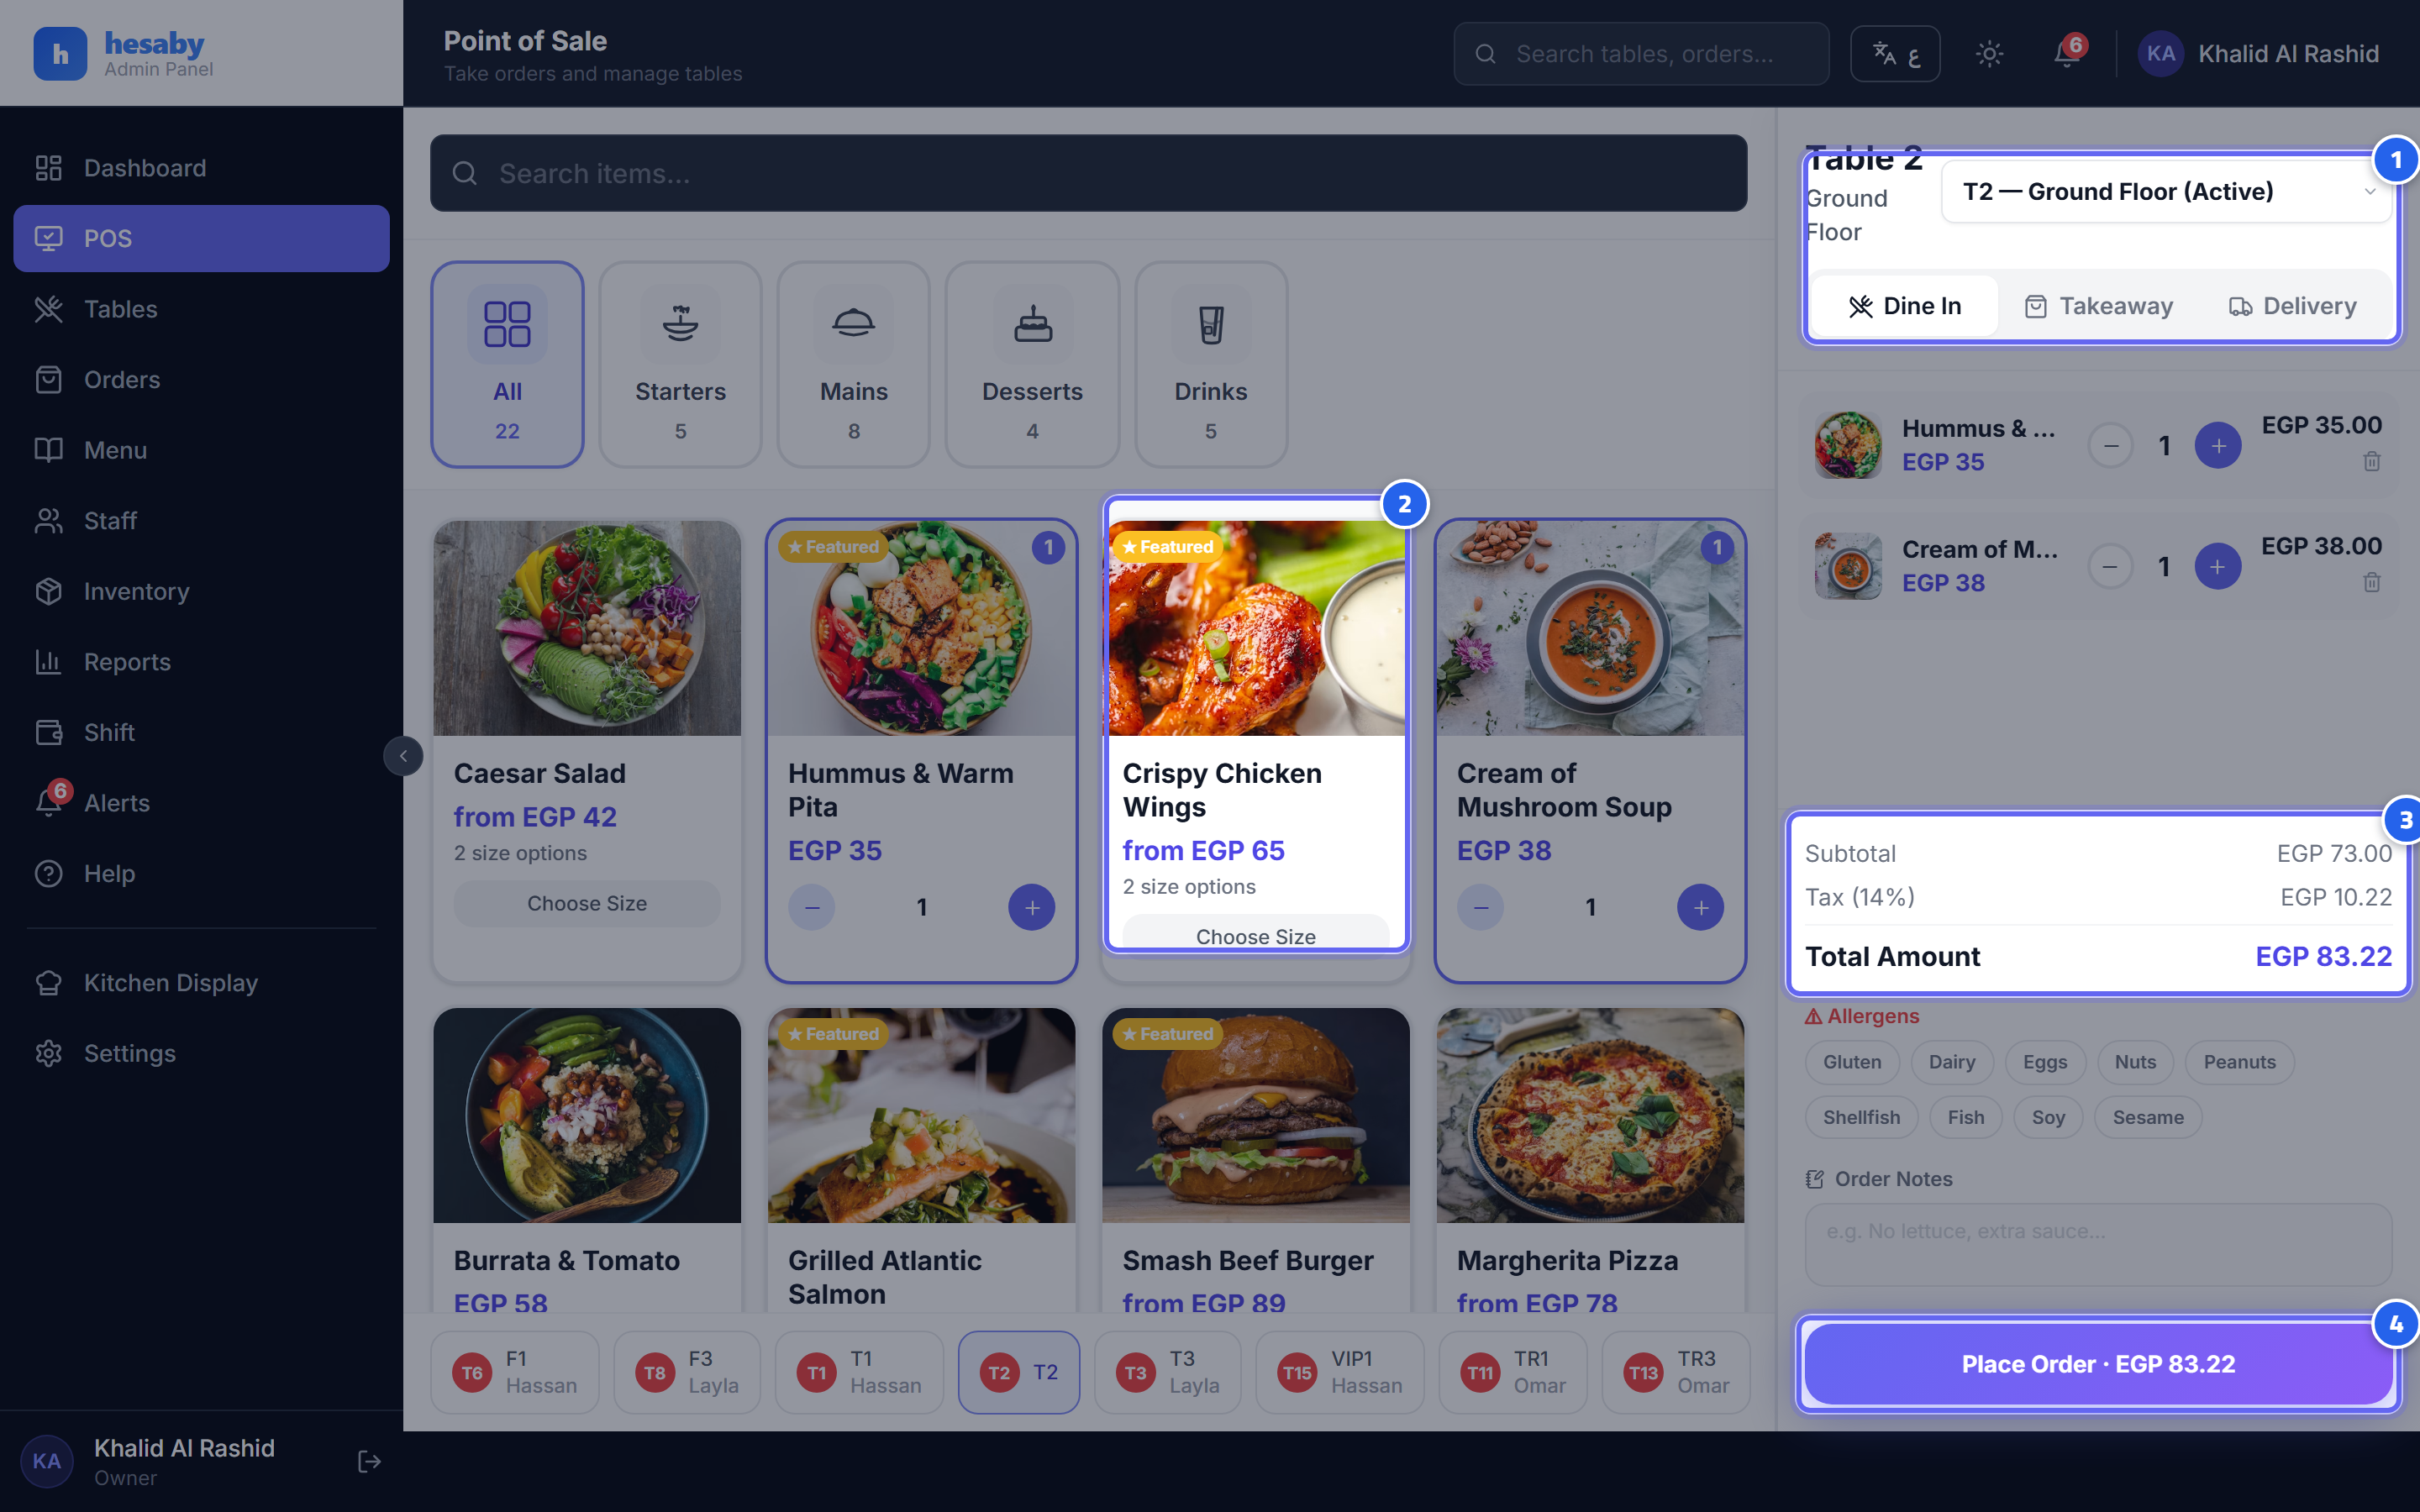
- Choose the table at the top of the order panel
- Tap an item in the menu to add it
- Review the total with VAT and service charge
- Tap Send / Confirm to send the order to the kitchen
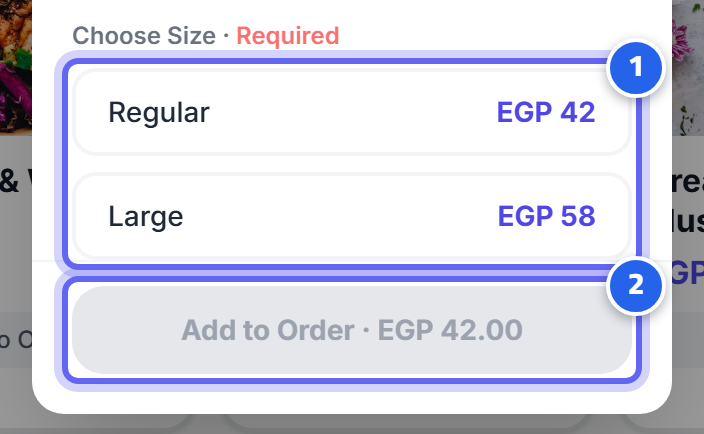
- Choose the item's size (and modifiers if available)
- Set the quantity and tap "Add to Order"
Steps
- Sign in with your PIN on the waiter app.
- Choose the table from the floor plan (the green/available tables).
- For a new table, set the number of guests (optional).
- Add items: tap an item in the menu → choose the size and modifiers if available → set the quantity.
- You can add a note to any item (for example: "no onions").
- Review the order on the right (the items + the total with VAT and service charge).
- Tap Send / Confirm → the order goes to the Kitchen Display System (KDS) instantly, and the table becomes "active".
Adding Items Later
If the guest orders more: open the same table → add the new items → send. They go straight to the kitchen.
Editing or Removing an Item
- Before payment: delete/edit freely.
- After the table has paid: any reduction requires manager approval (the manager enters their PIN) — and it's recorded in the loss-prevention report automatically.
Payment
When the guest is done: open the table → Pay → choose the payment method (cash/card/QR) or split the bill. Details are in Cash Payment and Splitting the Bill.
💡 The guest can also order and pay themselves by scanning the table's QR code — see QR Ordering.
Related articles: Delivery Orders · Void/Comp · Kitchen Display System